
How I Make Bookmarks ✨
💡Quick summary: My beginner-friendly bookmark workflow, from prepping the file to printing, cutting, and packaging.
What you’ll need (supplies)
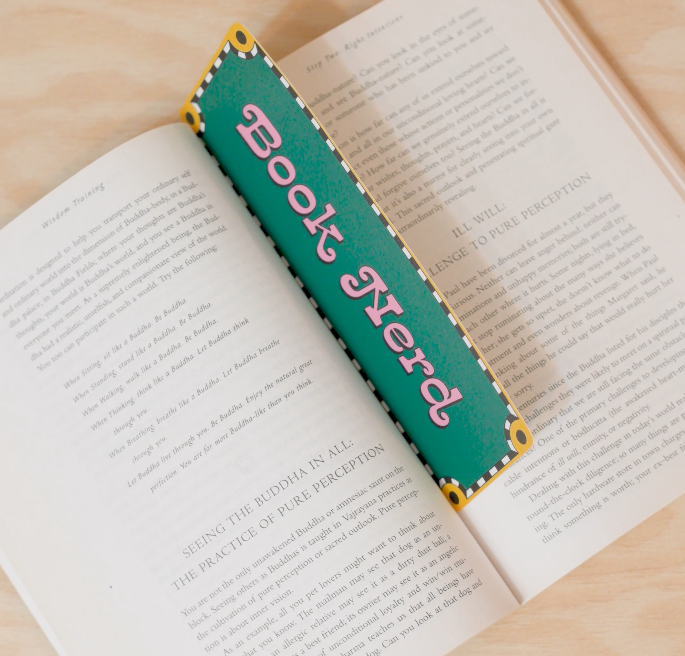
Grab a bookmark design file (I format mine at 2.5 x 7 inches)
Computer + design software (I use Adobe Illustrator)
Printer (any good home printer works—settings matter more than people think)
A4 photo paper (glossy or matte)
I personally like Teckwrap photo paper because it prints really clean for me
Cutting tools
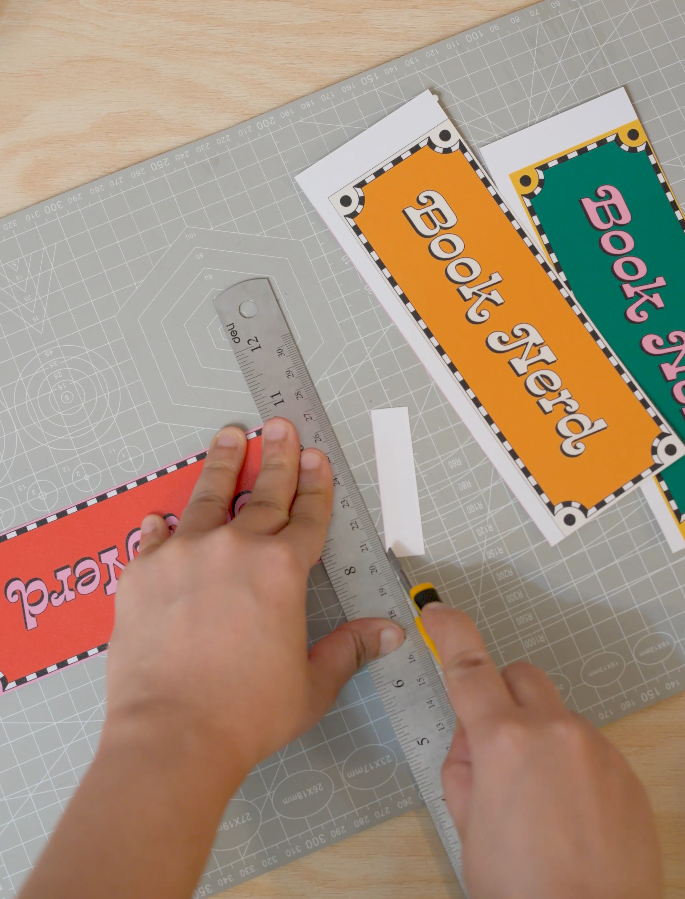
Paper trimmer or craft knife + metal ruler
Corner cutter (for rounded corners)
Optional upgrades
Laminating film (adds thickness + durability)
Backing card + sleeve + any branded packaging touches
Step-by-step: Let’s Make Handmade Bookmarks
1) Download the design + make it print-ready
Download your bookmark file and double-check it’s the correct size (for me: 2.5 x 7 inches).
If you’re using multiple bookmarks on one sheet, set up an A4 artboard and place them with consistent spacing.
2) Open your file in your editor (Illustrator)
Open Adobe Illustrator (or your program of choice)
Place the design and confirm the size one last time.
Do a quick visual check for:
alignment
borders
any text that’s too close to the edge (give yourself a little “breathing room”)
3) Print using high-quality settings
Load your A4 photo paper (glossy or matte—your choice).
In your print settings, choose:
Best/High quality (or the highest quality available)
The correct paper type (photo paper if your printer has that option)
Scale = 100% / Actual size (avoid “Fit to page” unless you want it resized)
Print a test sheet first if you’re trying a new paper or new settings.
4) Optional: add laminating film for durability
If I’m going for a sturdier, longer-lasting bookmark, I’ll add laminating film.
If I’m doing a quick homemade batch, I sometimes skip this—totally depends on the vibe and how fast I want to finish.
5) Cut + trim the edges
Trim the sheet into individual bookmarks.
Take your time here—the cleaner the cut, the more “store-bought” it looks.
6) Round the corners
Use a corner cutter to round all corners.
This is a small detail that instantly makes the bookmark feel more polished.
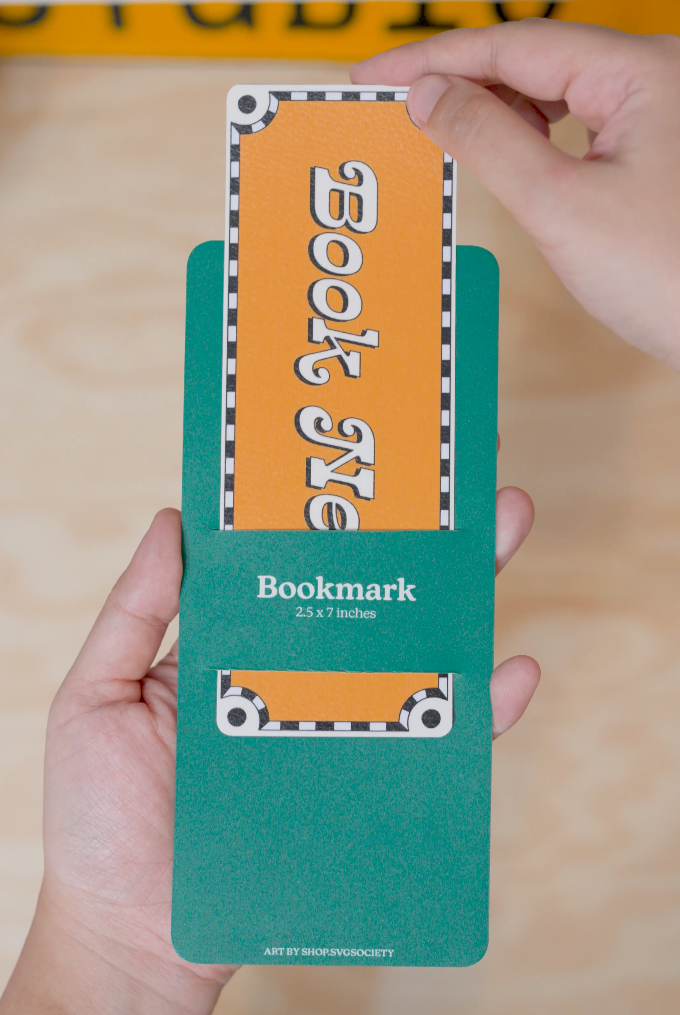
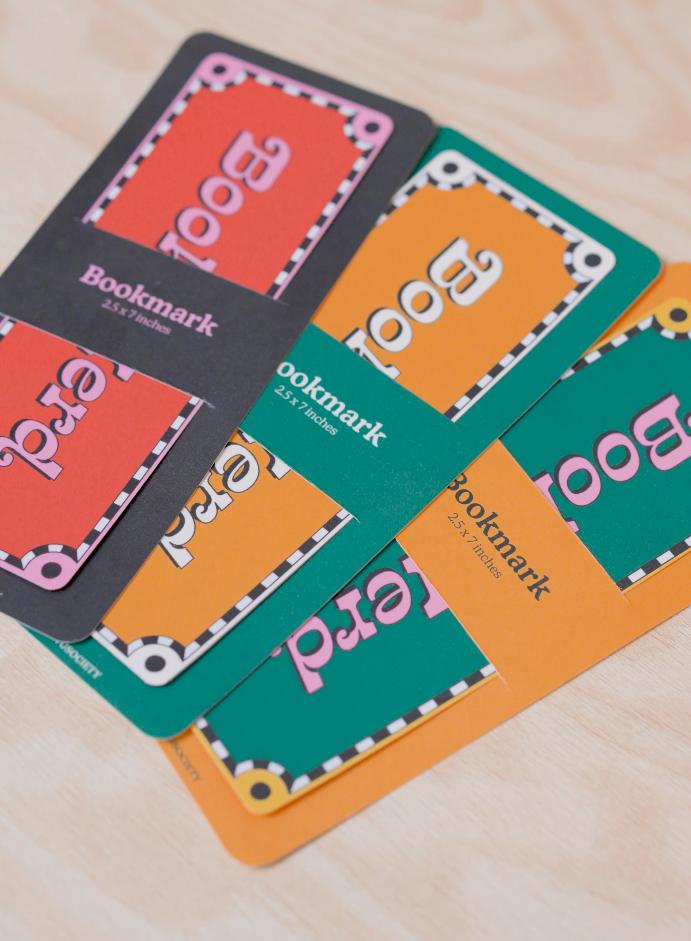
7) Package it up
Add your packaging (backing card, sleeve, branding, etc.).
This is where it becomes a full product experience, not just a printed piece of paper.
Beginner tips (so you don’t waste paper)
Always test print before doing a full batch.
If something looks slightly “off,” check print scaling first (it’s usually the culprit).
Keep a tiny “print log” (paper type + quality settings) once you find a combo settings that looks perfect for you.